|
|
|
|
|
|
|
| |
|
|
|
|
|
|
Product Testing performed with DraXxus Paintballs
What
do you think?
|
Stryker STR-1 Features HowItWorks Disassembly Adjustment Testing Data
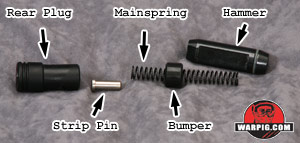
Pulling the strip pin while pressing on the rear plug allows the plug to be removed, followed by the mainspring, bumper and hammer.
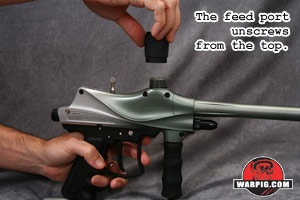
The feed port and barrel simply unscrew from the body. The friction o-ring the snugs the feed-port in place must also be removed.
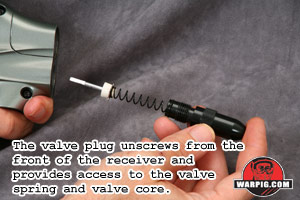
The LPC in the front can be unscrewed by hand. When it is removed, the valve spring and valve core lift out easily.
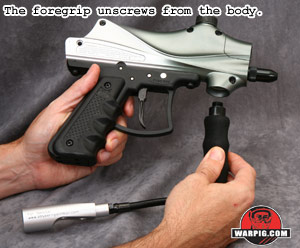
Once the bottom-line is removed from the grip frame, the foregrip can be unscrewed from the marker body.
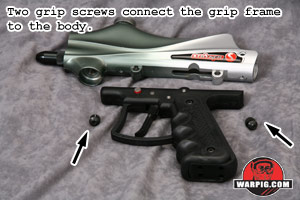
A pair of screws connect the grip frame to the receiver of the Stryker.
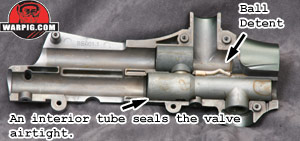
Inside the body is an inner body, a sleeve that makes up the sections of the upper and lower tubes that must be sealed airtight – something not practical with the two body halves.
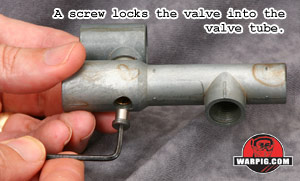
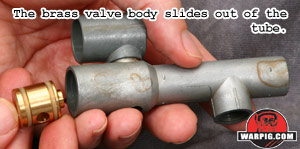
The valve can be removed from the inner core by removing its lock screw from the bottom of the core, and sliding the valve out the front.
“Down the barrel” leaks can come from a bad o-ring on the brass valve body, or a nick or debris on the valve's face or the cup seal. All of these components are easily inspected when the marker is disassembled. Re-assembly is done in the reverse order of disassembly. Care must be taken to ensure that the ball detent remains in place when the two receiver halves are rejoined, and that the hole in the hammer for the link pin is aligned vertically relative to the marker body. Continue to Adjustment.
|
| Copyright © 1992-2019
Corinthian Media Services. WARPIG's webmasters can be reached through our feedback form. All articles and images are copyrighted and may not be redistributed without the written permission of their original creators and Corinthian Media Services. The WARPIG paintball page is a collection of information and pointers to sources from around the internet and other locations. As such, Corinthian Media Services makes no claims to the trustworthiness or reliability of said information. The information contained in, and referenced by WARPIG, should not be used as a substitute for safety information from trained professionals in the paintball industry. |


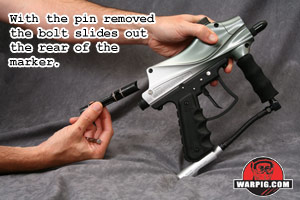 Disassembly of the Stryker starts with field stripping. Making sure the marker is unloaded and degassed, the link pun can be pulled out, releasing the bolt to slide out the back.
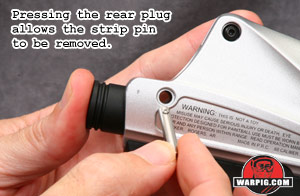
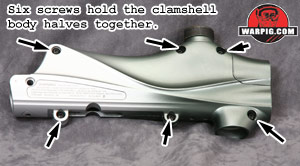 Six screws hold together the Stryker's two body halves. Two of these screws thread into steel nuts, but the remainder are threaded into the metal of the body. It is important during disassembly not to cross-thread or over-tighten these screws as the relatively soft cast alloy of the body can become stripped more easily than that of harder metals.